
To print on cardstock, adjust your printer settings to accommodate the thicker paper, and feed the cardstock into the printer’s manual feed slot to ensure proper printing. Printing on cardstock is a simple process that requires adjusting printer settings and using the manual feed slot to ensure high-quality results.
Many people choose cardstock for printing projects due to its durability and professional appearance. Whether you are creating invitations, business cards, or art prints, knowing how to print on cardstock is essential for achieving the desired outcome. By following a few simple steps, you can successfully print on cardstock and bring your creative ideas to life.
We will explore the necessary steps and tips for printing on cardstock, allowing you to produce professional-looking prints from the comfort of your own home.
Introduction To Cardstock Printing
When it comes to printing materials for special occasions or business needs, cardstock is a popular choice due to its durability and professional look. Understanding how to print on cardstock is essential for achieving high-quality results.
Why Choose Cardstock?
1. Durability: Cardstock is thicker and sturdier than regular paper, making it ideal for invitations, business cards, and other printed materials.
2. Professional Look: The thickness of cardstock gives a premium feel to printed designs, making them stand out.
3. Versatility: Cardstock comes in various colors and finishes, allowing for customization to suit different needs.
Potential Challenges
1. Printer Compatibility: Some printers may struggle with feeding thicker cardstock, leading to jams or misprints.
2. Smudging: Ink may take longer to dry on cardstock, increasing the risk of smudging during printing or handling.
3. Cost: Cardstock can be more expensive than regular paper, so it’s important to consider budget constraints.
Selecting The Right Cardstock
Choosing the right cardstock is crucial for achieving the desired results when printing. There are various factors to consider, including weight and thickness, finish and texture, and compatibility with your printer.
Weight And Thickness
The weight and thickness of the cardstock you choose will depend on the type of project you are working on. Generally, the thicker and heavier the cardstock, the more durable and high-quality it will be. Cardstock weight is measured in pounds (lb) or grams per square meter (gsm). The most commonly used cardstock weights for printing are between 65 lb to 110 lb. However, if you are printing invitations or other high-end projects, you may want to consider cardstock that is 120 lb or higher.
Finish And Texture
Another important factor to consider when selecting cardstock is the finish and texture. The finish refers to the surface of the cardstock and can be either glossy or matte. Glossy finishes are ideal for printing photos and images, while matte finishes are better for text-heavy projects. Texture refers to the feel of the cardstock and can range from smooth to embossed. Embossed cardstock adds a unique touch to invitations and other special projects.
Compatibility With Your Printer
Finally, it’s important to ensure that the cardstock you choose is compatible with your printer. Not all printers can handle thick cardstock, so make sure to check your printer’s specifications before making a purchase. Additionally, some printers may require adjustments to their settings to properly print on cardstock. Consult your printer manual or manufacturer’s website for guidance on how to adjust your printer’s settings for cardstock printing.
Preparing Your Printer
When it comes to printing on cardstock, preparing your printer is crucial to ensure high-quality results and prevent potential paper jams or printing issues. Properly adjusting printer settings, choosing the correct tray, and addressing paper feed issues are essential steps in this process.
Adjusting Printer Settings
Before printing on cardstock, it’s important to adjust the printer settings to accommodate the heavier paper weight. Access the printer settings through the control panel or printer software and select the appropriate paper type as cardstock or heavyweight paper. Additionally, adjust the print quality settings to ensure the ink or toner is applied evenly and with the appropriate intensity for cardstock printing.
Choosing The Correct Tray
Ensure that the printer is loaded with the appropriate tray for cardstock printing. Many printers have specific trays designated for heavier paper types. Consult the printer manual or manufacturer’s guidelines to identify the correct tray for cardstock and load the paper accordingly to prevent feed issues and potential damage to the printer.
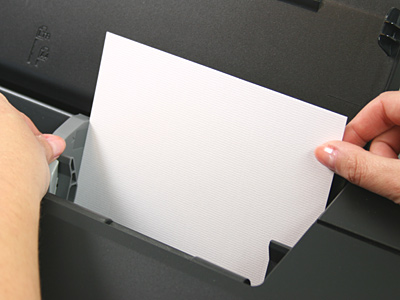
Handling Paper Feed Issues
If your printer experiences paper feed issues when printing on cardstock, check for any obstructions in the paper path and ensure that the paper is loaded correctly in the designated tray. Adjust the paper guides to securely hold the cardstock in place and prevent misfeeds or jams during the printing process.

Credit: www.foamcoreprint.com
Design Considerations
When it comes to printing on cardstock, there are several design considerations to keep in mind to ensure a high-quality final product. Paying attention to layout, color management, and the use of images and typography can make a significant difference in the outcome of your printed materials.
Layout And Margins
Proper layout and margin settings are crucial when printing on cardstock. Be sure to adjust your design to allow for bleed and trim areas, ensuring that important elements are not cut off during the printing process. Utilize adequate margins to prevent any essential content from being too close to the edge.
Color Management
Color accuracy is essential when printing on cardstock. Make sure to use the appropriate color profile for your project, and consider performing a test print to ensure that the colors appear as intended. Keep in mind that colors may appear differently on cardstock compared to standard paper, so adjustments may be necessary.
Use Of Images And Typography
When incorporating images and typography into your design, ensure that they are high-resolution and suitable for the cardstock material. Pay attention to the contrast and readability of text, especially if using decorative fonts. Additionally, consider the placement of images and text to create a visually appealing composition.
Printing Techniques
When it comes to printing on cardstock, using the right printing techniques is crucial to achieving professional results. Here’s a look at some key techniques to consider when printing on cardstock.
Single Vs. Double-sided Printing
Deciding whether to print single or double-sided on cardstock depends on the specific project requirements. Single-sided printing is suitable for simple designs, while double-sided printing is ideal for more complex projects and can provide a more professional appearance.
Alignment And Registration
Ensuring proper alignment and registration is essential when printing on cardstock. Proper alignment helps prevent misprints and ensures that the design is positioned correctly on the cardstock. It’s important to adjust the printer settings to achieve the desired alignment and registration for the specific project.
Test Prints And Proofs
Before committing to a full print run on cardstock, it’s advisable to create test prints and proofs. This allows for evaluating the color accuracy, print quality, and overall appearance before proceeding with the final print job. Test prints and proofs help identify any potential issues and ensure that the final printed result meets the desired standards.
Post-printing Processes
After printing on cardstock, the post-printing processes are crucial to ensure the final products meet the desired quality and look professional. These processes include cutting and trimming, folding and scoring, as well as lamination and embellishments. Implementing these steps correctly will enhance the appearance and durability of your printed materials, making them more appealing and long-lasting.
Cutting And Trimming
Properly cutting and trimming cardstock after printing is essential to achieve clean edges and precise dimensions. Utilize a sharp pair of scissors, a paper cutter, or a guillotine trimmer to carefully cut along the designated lines. Ensure that each piece is uniform in size and free from any rough edges or uneven cuts.
Folding And Scoring
When working with cardstock, folding and scoring are critical for creating professional-looking cards, invitations, or other materials. Use a bone folder or a scoring tool to create crisp and precise folds. This will prevent the cardstock from cracking or buckling, resulting in a neat and polished finished product.
Lamination And Embellishments
For added durability and a polished finish, consider laminating your printed cardstock. Lamination provides protection against moisture, tearing, and fading, prolonging the life of your materials. Additionally, you can enhance the visual appeal of your printed items by incorporating embellishments such as foiling, embossing, or adding decorative elements like ribbons or beads.
Troubleshooting Common Issues
To troubleshoot common issues when printing on cardstock, ensure printer settings match paper weight. Adjust paper tray guides for proper alignment to avoid jams and smudging. Consider selecting the ‘Thick Paper’ or ‘Cardstock’ setting for optimal results.
Printing on cardstock can be a bit tricky, especially if you’re not used to handling thicker paper. While cardstock can produce beautiful and professional-looking prints, there are some common issues that you might encounter along the way. In this post, we’ll discuss some of these issues and provide you with some tips on how to troubleshoot them.Ink Smudging And Bleeding
One of the most common issues when printing on cardstock is ink smudging or bleeding. This can happen when the ink doesn’t dry fast enough or when the paper absorbs too much ink. To avoid this problem, you can try the following:- Use a printer with a higher print resolution.
- Choose the right type of ink for your printer and paper.
- Print in draft mode or use a lower ink density setting.
- Allow the ink to dry completely before handling the paper.
Paper Jams And Misfeeds
Another common issue when printing on cardstock is paper jams and misfeeds. This can happen when the paper is too thick or when the printer rollers can’t handle the weight of the paper. To avoid this problem, you can try the following:- Use a printer that is designed to handle thicker paper.
- Make sure the paper is loaded correctly and aligned properly.
- Print one sheet at a time to avoid overloading the printer.
- Check the printer manual for specific instructions on how to print on cardstock.
Color Accuracy And Fidelity
Finally, another issue that you might encounter when printing on cardstock is color accuracy and fidelity. This can happen when the printer is not calibrated properly or when the paper absorbs too much ink. To avoid this problem, you can try the following:- Calibrate your printer regularly to ensure accurate colors.
- Choose the right type of paper for the colors you want to print.
- Use a color profile that is specifically designed for your printer and paper.
- Print a test sheet to check the colors before printing a large batch.
Preservation And Storage
For preserving and storing cardstock prints, keep them in a cool, dry place away from direct sunlight. Use acid-free paper or tissue to separate the sheets and store them flat to prevent bending. Consider using archival sleeves or binders for added protection.
Storing Unused Cardstock
Keep unused cardstock in a cool, dry place away from sunlight.
Protecting Finished Prints
Store finished prints in acid-free folders or sleeves to prevent damage.
Longevity Tips
Use archival-quality materials for printing to enhance durability.
Advanced Techniques
In the realm of printing on cardstock, Advanced Techniques can elevate your projects to the next level. Let’s delve into some sophisticated methods that can make your prints stand out.
Specialty Inks And Effects
Experiment with metallic inks for a luxurious touch or glow-in-the-dark inks for a fun twist. Embossing and debossing can add texture and depth to your designs.
Professional Finishing Touches
Consider spot UV coating for a glossy, high-end look. Foil stamping can add a touch of elegance. Die-cutting allows for intricate shapes and designs.
Outsourcing Vs. Diy
Evaluate cost, time, and quality when deciding between outsourcing or DIY. Professional printers offer expertise, while DIY provides creative control.
Credit: trueimagetech.com
Credit: lcipaper.com
Frequently Asked Questions
Can I Print Cardstock On A Regular Printer?
Yes, you can print cardstock on a regular printer. Make sure the printer supports the weight and thickness of the cardstock for best results. Adjust printer settings for paper type and thickness before printing.
How To Print On Cardstock On Hp Printer?
To print on cardstock with an HP printer, adjust settings for paper type and thickness. Select cardstock in print settings and ensure the printer is set for thicker paper. Feed one sheet at a time for best results.
How Do You Print On A Paper Card?
To print on a paper card, use a printer with a cardstock setting, load the cards carefully, adjust print settings, and hit print.
How Do You Print And Design On Cardstock?
To print and design on cardstock, use a high-quality printer and design software. Adjust printer settings for cardstock thickness. Experiment with designs and colors for a professional finish. Consider using a print shop for intricate designs or large quantities.
Conclusion
Mastering printing on cardstock requires attention to detail and the right tools. By following these steps, you can achieve professional-looking results. Practice, experiment, and don’t be afraid to make mistakes – it’s all part of the learning process. Happy printing on cardstock!