
To change miter saw blade, first disconnect the power supply, then loosen the bolt securing the blade. Rotate the blade guard for access and replace the blade, securing it with the bolt.
Before tackling the task of changing a miter saw blade, safety, and preparation take priority. Ensuring your miter saw is unplugged or removed from its power source is critical to prevent accidental activation. Over time, saw blades become dull or may suffer damage from extensive use; it’s essential for efficiency and precision cuts to keep them sharp or replace them when necessary.
This procedure is relatively simple and requires minimal tools, typically only a wrench or an Allen key provided with your saw. Having a sharp new blade not only improves the cut quality but also enhances the safety and performance of your power tool. Regular maintenance, including blade changes, extends the life of your miter saw, making this skill an invaluable part of woodworking and construction tasks.

Safety Precautions Before Starting
Changing a miter saw blade requires careful preparation. Safety must come first. There are risks, but you can minimize them. Follow these steps before you begin. Stay safe and keep accidents at bay.
Wear Protective Gear
Always wear protective gear before you start. Safety glasses shield your eyes from metal fragments. Gloves protect your hands from sharp edges. A dust mask keeps you from inhaling small particles. Make sure to put on the right gear.
Disconnect Power Source
Never work on a saw plugged in. Unplug the saw to prevent it from turning on. This should be the first step. It’s a crucial part of preventing injuries. Double-check to ensure it’s disconnected. Only then should you proceed.
- Check the plug is fully out.
- Remove any batteries if it’s a cordless saw.
- Confirm the power is off.
Tools And Materials Needed
Changing a miter saw blade is a straightforward task. The right tools and a new blade are key to a smooth change. Below is everything required for this DIY project.
Gather Necessary Tools
To begin, having the correct tools ensures safety and efficiency. Here are the essentials:
- Wrench: Typically included with the saw for blade removal.
- Screwdriver: For loosening any screws if necessary.
- Allen Wrench/Hex Key: For some saw models.
- Work Gloves: To protect hands from sharp edges.
- Safety Goggles: Eye protection is a must.
Select The Right Blade
Choosing a new blade is crucial for cutting precision. Consider these aspects:
| Blade Diameter | Must match the saw’s size specification. |
|---|---|
| Teeth Count | More teeth for finer cuts, fewer for rough cuts. |
| Material | Select a blade designed for the material to cut. |
| Arbor Size | The hole in the center should fit the saw’s arbor. |
Remember, consult the saw’s manual for blade specifications. A perfect match is key to top-notch work.
Preparation Steps
Before starting the blade change on a miter saw, preparing properly is key. Safety and accuracy are crucial in this process. Follow these preparation steps to ensure a successful blade change.
Secure The Saw
Turn off the power. Unplug the saw from any electrical outlets. This step prevents the saw from accidentally turning on during the blade change. Stabilize the saw by clamping it onto a workbench or stable surface. This keeps the saw from moving and guarantees a safer blade replacement.
Raise The Blade Guard
To access the blade, lift the blade guard. Look for the lever or knob that releases the guard. Once found, pull it gently to raise the guard and expose the blade. Place the guard in a safe position to allow unhindered access to the saw blade.
After these steps, ensure that the necessary tools, such as wrenches and screwdrivers, are within easy reach. With these items prepared and safety measures in place, you’re ready to proceed with changing the miter saw blade.
Removing The Old Blade
Before installing a shiny new blade on a miter saw, the old one must come off. This process is straightforward but demands attention to safety and detail. With the right approach, even a beginner can change the blade easily.
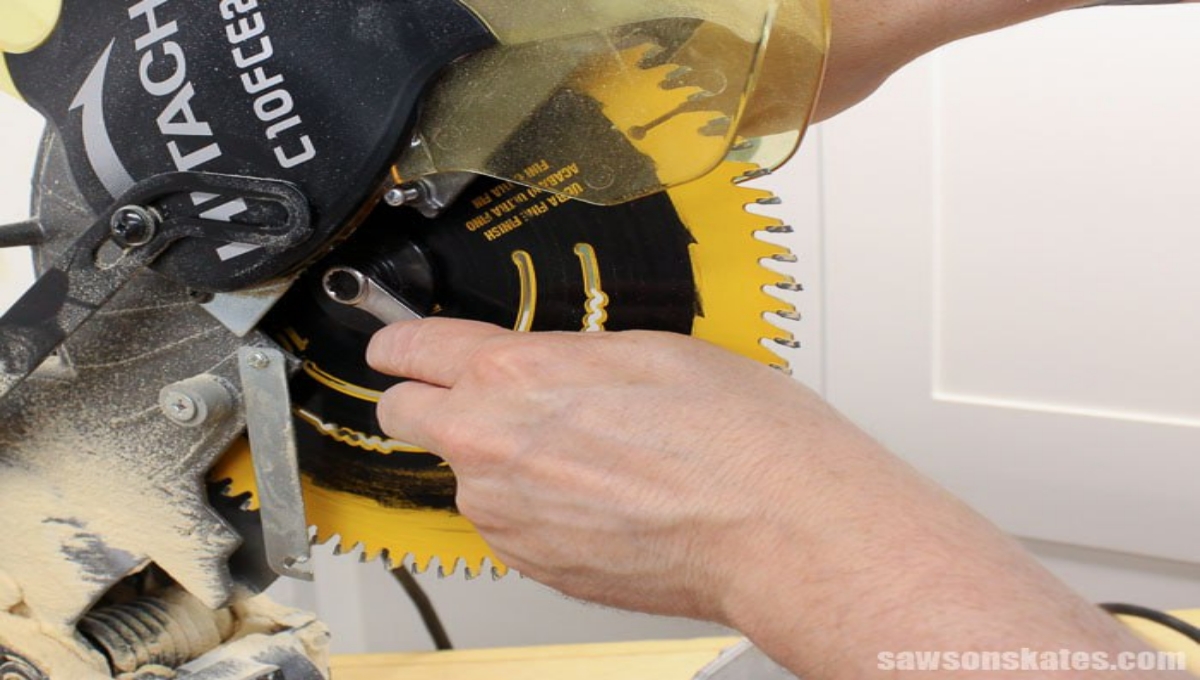
Loosen The Blade Bolt
Start by making sure the miter saw is off and unplugged. This precaution is crucial to prevent any accidental starts. Find the blade lock pin. It’s usually located near the blade guard. Press and hold it to prevent the blade from turning. Use the wrench that came with your miter saw. Place it on the bolt in the center of the blade. Most saws have a bolt with a reverse thread. Turn the wrench in the direction of the blade’s spin to loosen the bolt.
Carefully Remove The Blade
Once the bolt is loose, take it out completely along with the outer washer. Carefully lift the blade guard to expose the blade. Keep fingers away from the teeth. Grip the blade by its sides and wiggle it slightly to lift it off from the spindle. Place the old blade on a wooden or rubber surface to prevent injuries or damage.
- Ensure the saw is unpowered before starting.
- Loosen the blade bolt carefully with the proper wrench.
- Remove the blade with caution, avoiding the teeth.
With these steps, the miter saw will be ready for a new blade. Safety should be the top priority, so take your time and work with care.
Installing The New Blade
Now that the old blade is off your miter saw, it’s time to install the new one. Follow these steps to ensure the process is safe and correct. Don’t rush—taking your time will pay off with precise cuts and a long-lasting blade.
Position The New Blade
Before you start, make sure the teeth of the blade face in the right direction. They should point down and towards the back of the saw. Carefully place the blade on the spindle, aligning it with the saw’s flanges.
Tighten The Blade Bolt
After positioning the blade, press the spindle lock to keep the blade from moving. Use the wrench that came with your saw to tighten the blade bolt. Turn the bolt in the direction indicated, usually opposite the blade rotation. Make sure the bolt is snug but do not over-tighten, as this can damage the blade.
Once the new blade is secure, lower the saw’s arm and return the guard to its position. Plug your miter saw back in and make a test cut to ensure the blade is properly installed. You’re now ready for your next project with a new blade poised for perfect cuts!
Final Checks And Testing
Once you’ve managed to swap out the old blade for a new one on your miter saw, what comes next is crucial. It’s time to make sure everything is secure and in perfect order before making any cuts. This means inspecting the blade installation and performing a test cut. These steps ensure that the blade operates safely and delivers the precise results you need.
Inspect Installation
Before powering up the miter saw, take a moment to double-check your work. Confirm that the blade is mounted correctly with the teeth pointing in the right direction. Each tooth should face away from the saw when it spins. Make sure the blade is tight and that the arbor nut is secured. Look for any side-to-side wobble, which could indicate a problem. Checking the following ensures a smooth operation:
- Blade direction and alignment
- Arbor nut tightness
- Blade stability with no wobble
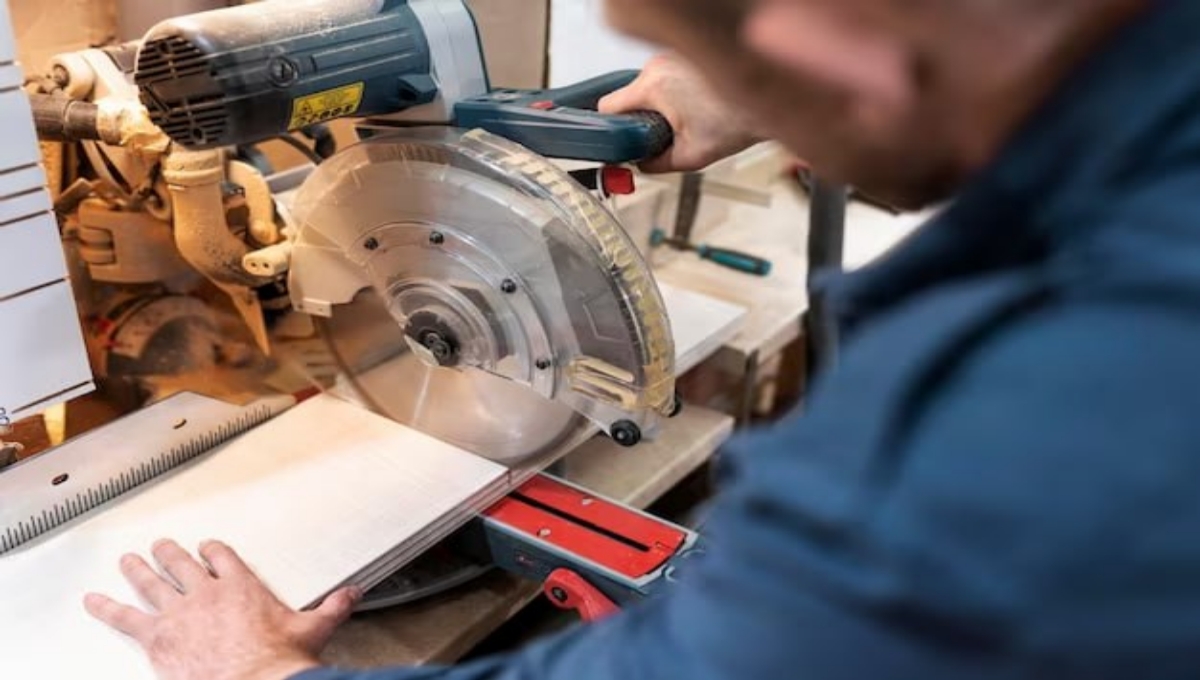
Perform A Test Cut
Now, it’s the moment of truth. Secure a piece of scrap wood to the miter saw table. Make sure it’s firm and won’t move during the cut. Use proper safety gear, such as goggles and hearing protection. Turn on the saw and gently lower the blade into the wood. Listen for any unusual sounds and watch how the saw cuts through the material. The blade should slice cleanly without struggle. Once complete, turn off the saw and inspect the cut:
| What to Check | Expected Outcome |
|---|---|
| Cut Edges | Smooth, no tear-out |
| Cut Accuracy | Straight and true |
| Blade Performance | No burning or binding |
Successful test cuts confirm that the blade is ready for real projects. A flawless performance in the test cut means the blade change was a success. Ensure these final checks, and enjoy safe and precise cutting on all future projects with your miter saw.
FAQs About How To Change Miter Saw Blade
What Tools Are Needed To Replace A Miter Saw Blade?
To change a miter saw blade, you’ll typically need an Allen wrench or hex key, a screwdriver, and the saw’s blade wrench.
Can You Change A Miter Saw Blade Safely?
Yes, by unplugging the saw, retracting the blade guard, and following the manufacturer’s instructions, you can safely change the blade.
What Are The Steps For Changing A Miter Saw Blade?
First, disconnect the power, remove the spindle lock, loosen the bolt, replace the blade, then re-tighten the bolt, and replace the guard.
How Often Should Miter Saw Blades Be Changed?
Change your blade when it shows signs of wear, such as chipping or difficulty cutting, which varies depending on usage and material cut.
Is It Difficult To Change The Blade On A Miter Saw?
Changing a miter saw blade is a straightforward task that requires minimal tools and simple steps outlined in your saw’s user manual.
What Safety Precautions Should Be Taken When Changing A Miter Saw Blade?
Always disconnect the power source, wear protective gloves, and ensure the blade has stopped moving before attempting to change it.
Conclusion
Changing your miter saw blade can seem daunting, but it’s quite manageable with the right guidance. By following the steps we’ve outlined, you’ll ensure your cuts remain precise and your work efficient. Remember, safety first and always refer to the manufacturer’s instructions.
Keep your projects moving smoothly with a sharp, well-installed blade every time.