
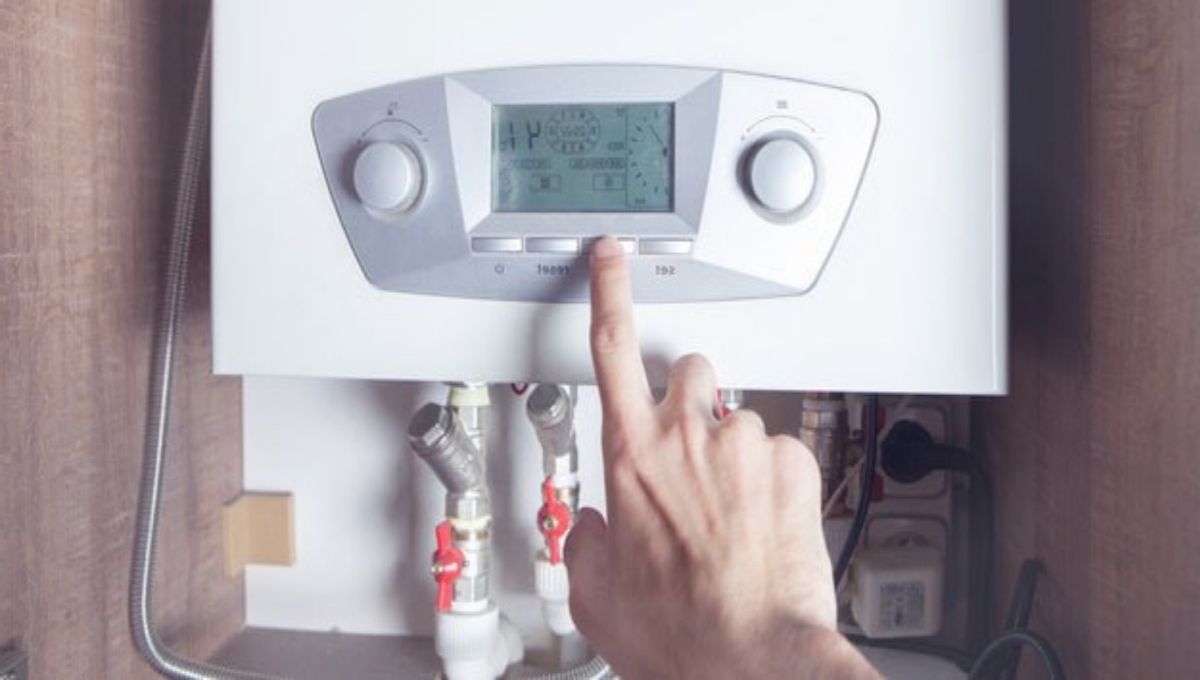
To use a Braeburn thermostat, first ensure it’s correctly installed and has power. Then, follow the user manual to program its settings to your preferences.
Braeburn thermostats are designed for user-friendly operation, allowing homeowners to manage their indoor climate efficiently. These devices come equipped with clear displays and intuitive controls, so even novices can quickly learn how to adjust temperatures and set schedules. Whether you have a basic non-programmable model or a more advanced programmable one, understanding how to operate your Braeburn thermostat can lead to improved comfort and potentially lower energy bills.
Before diving in, familiarize yourself with the specific model you have, as features may vary. Grab the manual, and let’s get started! With a few button presses, you’ll be on your way to mastering your home’s heating and cooling system.
Why Choose A Braeburn Thermostat
Managing your home’s comfort with precision and ease defines Braeburn Thermostats. These devices stand out for reliable performance and user-friendly features. Upgrading to a Braeburn unit promises a blend of quality, affordability, and energy-efficient operation.
Key Features and BenefitsKey Features And Benefits
Braeburn thermostats lead with robust features. Here’s why they shine:
- Programmable options for daily and weekly schedules save money.
- A user-friendly interface makes control a breeze.
- Large, backlit displays offer clear readings.
- Smartphone connectivity on select models allows remote adjustments.
- Models with air filter change reminders improve air quality.
Compatibility With HVAC Systems
Braeburn has a compatible thermostat for every HVAC system:
| Thermostat Model | System Type | Features |
|---|---|---|
| Basic Non-Programmable | Single Stage | Simple controls, battery-operated |
| Deluxe Programmable | Multi-Stage, Heat Pump | 7-day programming, Dual power |
| Wi-Fi Smart Thermostats | Universal Compatibility | App control, Usage reports |
Select the right model for your unique HVAC system and enjoy peace of mind with seamless integration.
Unboxing Your Braeburn Thermostat
Welcome to the exciting journey of upgrading your home’s comfort with a Braeburn thermostat. This practical guide helps you understand what’s inside the box and introduces you to the parts of your new thermostat.
Package Contents
Inside your Braeburn thermostat’s packaging, you will find everything needed for a smooth installation. Check the contents against the list below to ensure all components are present:
- Braeburn Thermostat Unit
- Mounting Hardware (screws and anchors)
- Installation Manual and User Guide
- Batteries (if required)
Understanding The Parts
Recognizing each part of your Braeburn thermostat is crucial. Below, see a breakdown of key components:
| Part | Description |
|---|---|
| Display | It shows temperature, settings, and messages. |
| Buttons | They allow you to adjust settings. |
| Battery Compartment | This holds the batteries powering the unit. |
| Wire Terminals | They connect to your HVAC system’s wires. |
Be sure to familiarize yourself with the installation manual. It provides detailed steps and safety information for proper setup. Now, you’re on your way to enjoying a comfortable and well-regulated home environment.

Mounting And Installation
Getting your Braeburn thermostat up and running is easy with the right tools and a clear guide. Proper installation ensures your device functions correctly, keeping your home at the perfect temperature.
Tools Required For Installation
Before starting, gather these tools:
- Screwdriver: For securing the mounting plate.
- Level: To ensure the thermostat is straight.
- Drill: If you need to make new holes in the wall.
- Wire stripper: To prepare the wires for connection.
- Anchors and screws: Included with your thermostat for mounting.
Step-by-step Installation Process
Follow these simple steps for a successful installation:
- Turn Off Power: Safety first! Always switch off the power to avoid electric shocks.
- Remove the Old Thermostat: Carefully detach it to expose wires.
- Label Wires: Mark each wire with the provided labels according to their connection points.
- Mounting Plate: Position the new mounting plate on the wall where the old one was located.
- Level & Secure: Use the level to align the plate, then secure it with screws.
- Wire Connection: Match the wires to the corresponding terminals on the Braeburn.
- Attach Thermostat: Gently push your Braeburn onto the mounting plate until it clicks into place.
- Power Up: Turn the power back on and configure your settings. Your Braeburn is ready to use!
If any issues arise, refer to the specific model’s manual or contact customer support for assistance.
Programming Your Thermostat
Are you ready to take control of your indoor climate? Programming your Braeburn thermostat isn’t just smart; it’s a budget-friendly move that keeps comfort and energy bills low. Let’s get started!
Setting The Date And Time
First things first, your thermostat needs to know the current date and time. This is crucial for scheduling and maintaining accurate temperature settings throughout the day.
- Press the ‘Menu’ button on the thermostat.
- Using the arrow keys, navigate to the ‘Date/Time’ settings.
- Adjust the values using the ‘+’ and ‘-‘ buttons.
- Confirm each setting by pressing ‘Next’.
- Once complete, hit ‘Done’ to save.
Customizing Temperature Settings
Creating a personalized schedule for your comfort level is key to maximizing energy efficiency. It’s easy to set up with your Braeburn thermostat.
To enter the programming mode:
- Press ‘Program’.
- Choose the day of the week to start.
Set your desired temperatures for different times of the day:
| Period | Temperature |
|---|---|
| Morning (6 AM – 8 AM) | Use '+' or '-' to set temp |
| Day (8 AM – 6 PM) | Adjust temp for day |
| Evening (6 PM – 11 PM) | Evening comfort level |
| Night (11 PM – 6 AM) | Cooler night setting |
- Repeat the process for each time slot.
- Select different settings for weekdays and weekends.
Finalize your program by pressing ‘Done’. Your Braeburn thermostat now knows exactly when to adjust for comfort and savings!

Troubleshooting Common Issues
Encountering a glitch with your Braeburn thermostat can be a hiccup in your day-to-day comfort. Don’t worry, though; most problems have simple fixes. In this section, we explore common issues and guide you through resolving them quickly. Keep your indoor climate control in check with these troubleshooting techniques.
Resolving Display Problems
A blank or unresponsive display can leave you in the dark about your home’s temperature settings. Let’s light the way to a solution. First, check if the thermostat is receiving power. This might involve flipping a circuit breaker or checking for a tripped fuse.
Next, assess the batteries if your model is battery-operated. Replacing old batteries can quickly bring the display back to life. If these steps don’t work, gently clean the battery contacts to ensure a solid connection.
Fixing Heating Or Cooling Malfunctions
A thermostat that’s not triggering heating or cooling can be frustrating. Begin with the simplest step: verify your settings. Make sure the system is set to heat or cool as needed and the temperature is correctly set.
If the settings are correct, inspect the air filters. Clogged filters restrict airflow, impeding the system’s operation. Replace dirty filters to clear the way for your HVAC to function efficiently.
Dive deeper by checking the wiring. Shut off the power to the thermostat and remove the cover. Ensure all wires are securely attached and have no signs of damage. If you’re uncomfortable with wiring, call a professional.
It’s not uncommon for heating and cooling malfunctions to arise from simple misunderstandings. Sometimes, a quick manual review provides the clarity needed for proper operation. If these steps don’t resolve the issue, don’t hesitate to contact a technician.
With these troubleshooting tips, maintain your home’s comfort with ease. Your Braeburn thermostat should respond well to these simple solutions, and you’ll be back to a perfectly tempered space in no time.
Maintaining Your Thermostat
Just like any household device, your Braeburn thermostat needs regular care to perform its best. Proper maintenance not only ensures accuracy but also extends the life of the thermostat. Here are simple yet crucial steps to keep your Braeburn Thermostat in top-notch condition.
Regular Cleaning Tips
Cleaning your Braeburn Thermostat should be a gentle process. Dust and dirt can affect its functioning, so regular cleaning is key. Follow these steps for a clean thermostat:
- Turn off the thermostat to avoid electrical issues.
- Use a soft brush or compressed air to remove dust from the surface.
- Wipe the screen with a soft, damp cloth. Avoid harsh cleaners.
- Clear the area around it to prevent blockages.
When To Seek Professional Help
Sometimes your thermostat may require an expert touch. Look out for these signs that signal it’s time to call a professional:
- Display issues that persist after cleaning and battery replacement.
- Heating or cooling starts to lag or becomes inconsistent.
- Error messages that don’t resolve with troubleshooting.
- Wiring problems visible or suspected.
An experienced technician will handle complex issues and ensure your Braeburn Thermostat operates smoothly.
FAQs About How To Use Braeburn Thermostat
How Does A Braeburn Thermostat Work?
Braeburn thermostats control your home’s temperature by signaling your HVAC system to turn on or off based on the settings you choose.
Can I Program My Braeburn Thermostat Easily?
Yes, Braeburn thermostats typically feature user-friendly interfaces for easy programming of daily or weekly temperature schedules.
What To Do If Braeburn Thermostat Malfunctions?
To troubleshoot, check the power source, examine settings, and reset the unit by pressing the reset button or flipping the circuit breaker.
Are Braeburn Thermostats Energy Efficient?
Braeburn thermostats can enhance energy efficiency by allowing precise temperature control and programmable settings that reduce HVAC system use when not needed.
How To Set Braeburn Thermostat Vacation Mode?
Enter the menu, select ‘Vacation Mode’, and input your desired temperature and duration to maintain energy efficiency while away from home.
Can Braeburn Thermostats Link To Smart Devices?
Some Braeburn models offer connectivity to smart devices, enabling control via apps or voice commands for added convenience and advanced functionality.
Conclusion
Understanding your Braeburn thermostat is key to maximizing comfort and energy efficiency at home. With the straightforward steps outlined, you’re now equipped to navigate settings and schedules with ease. Embrace the simplicity and enjoy a perfectly tailored indoor climate that aligns with your daily routine.
Remember, a well-adjusted thermostat not only saves money but also enhances your living environment.
Pingback: How to Take Apart a Treadmill: Simple Steps for Storage - Digital Deluxury
Pingback: How Long is Taco Bell Good for in the Fridge: Fresh Tips! - Digital Deluxury
Pingback: How to Program a Braeburn Thermostat: Easy Guide! - Digital Deluxury